Stripe Subscription
The Stripe Subscription provider allows the purchasing of Stripe Subscription plans. As such, it works in quite a specific way compared to other payment providers.
Where other providers simply pass payment details through to the payment gateway to be paid for, the Stripe Subscription provider passes through payment details along with Plan ID's that MUST match up with subscription plans setup in Stripe.
Because of this, when using the Stripe Subscription payment provider, it is assumed the Order contains only subscription plan order line items, and that each order line item's SKU (or an OrderLine property of "planId") matches a Plan ID within Stripe. Also, whilst a price will exist on the product page for displaying on the site, the actual price charged will come from the Stripe plan, so it's important that these are kept in sync.
Finally, because Tea Commerce's role is purely to facilitate the checkout process, the Stripe Subscription provider will simply setup the subscription and charge the initial fee. From then on, subsequent renewal payments will be handled soley via Stripe. If you want to trigger custom actions within Tea Commerce / Umbraco, for example to email a customer if a subscription payment fails, you should create a Stripe webhook to listen for relevant updates and trigger these actions manually.
Configure Stripe
Login to the Stripe dashboard.
Subscription Plans
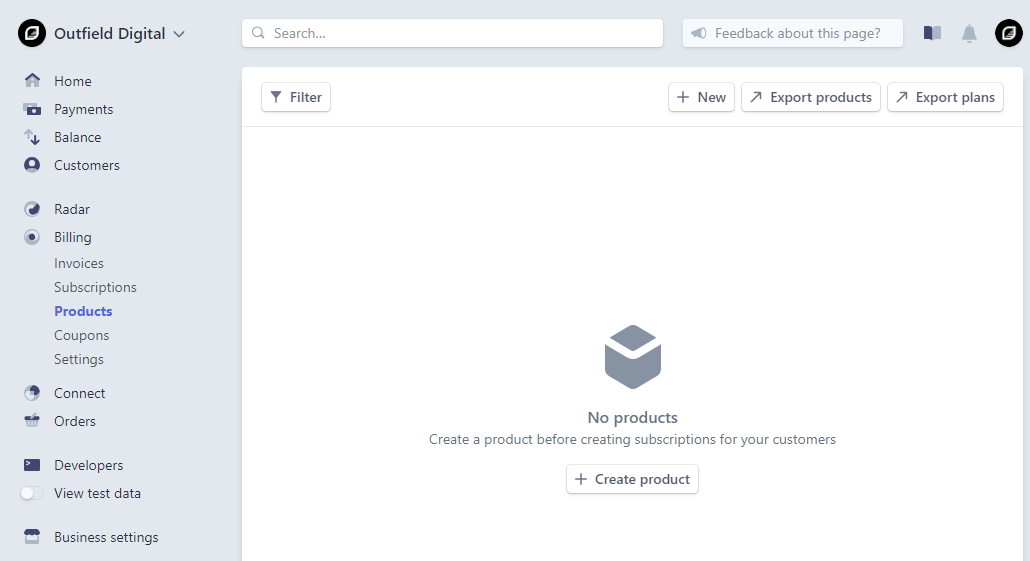
To create a Subscription Plan, click Billing and Product from the left hand side menu. On the right hand side, click Create Product.
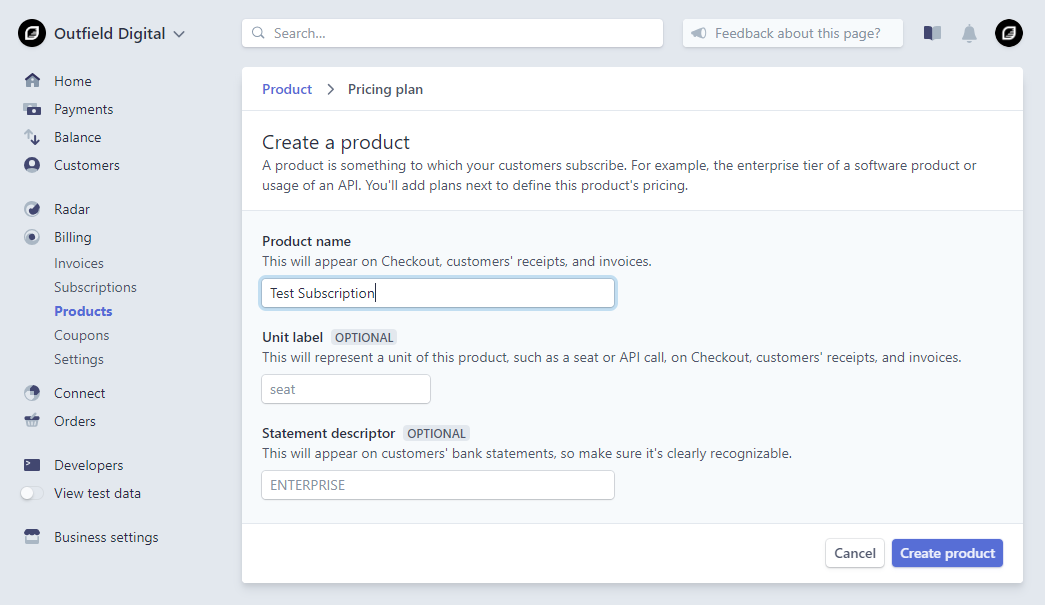
On the next screen, enter a name for the subscription plan and click Create product.
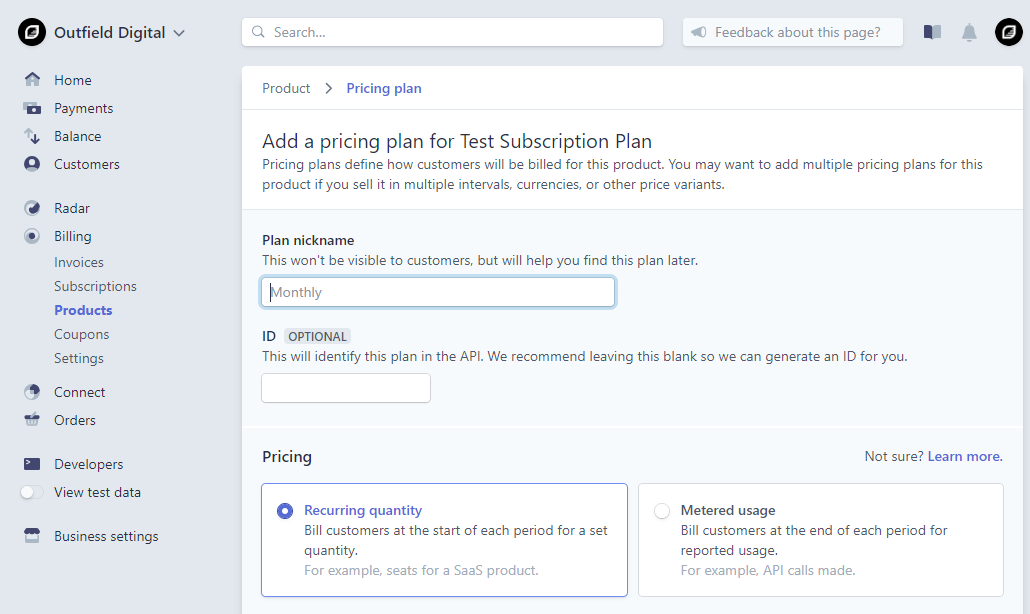
On the next screen, fill in the details of the plan such as the recuring interval + pricing. Prices entered in Stripe should be exlcuding VAT as it is will be decided by Tea Commerce the relevant VAT Group and thus tax rate which applies. Once complete click Add pricing plan.
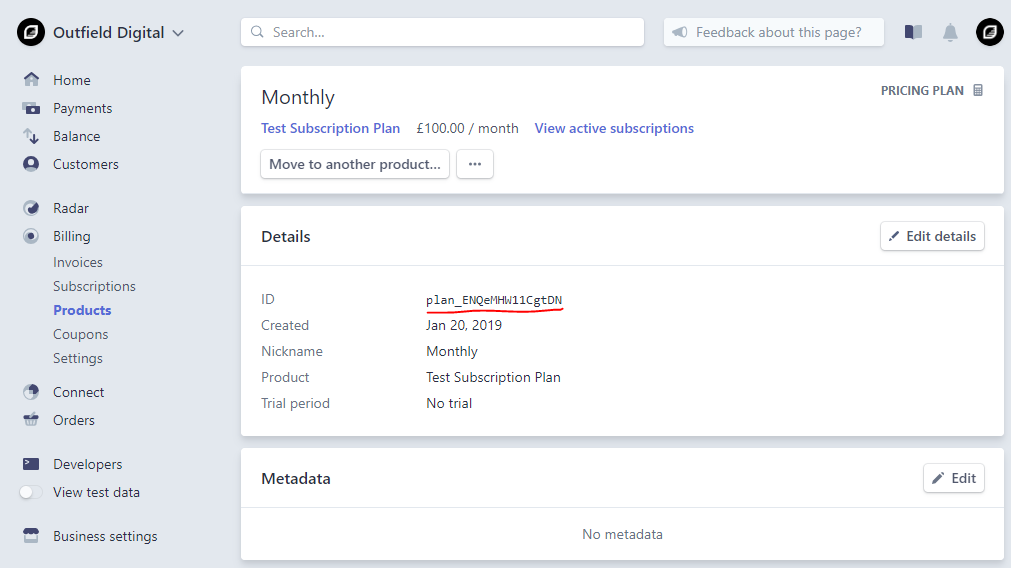
NB If you chose not to set a plan ID manually, one will be created for you by Stripe. You should keep track of this as you'll need to store this against the product node within Umbraco.
Repeat the steps above for each subscription plan you wish to create.
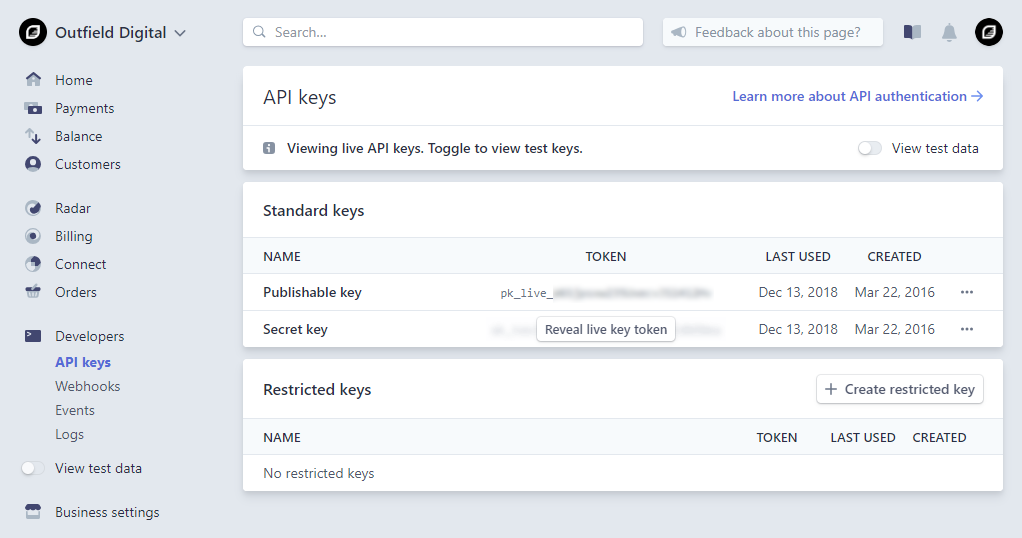
Live API Keys
Click Developers and then API Keys in the left hand side menu. On the right hand side you will find your Publishable key. To view your Secret key, click the Reveal live key token.
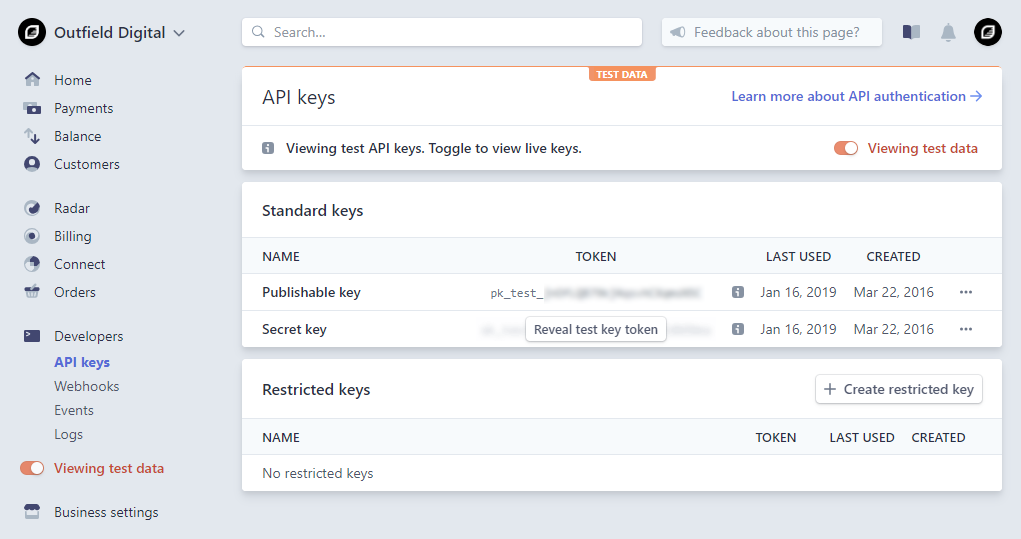
Test API Keys
To retreieve your test API keys, click the View test data toggle switch in the left hand side menu and then repeat the steps outlined in the Live API Keys section above.
Webhook Notifications
When using the StripeSubscription provider, the status of an order is updated based on responses from Stripe sent over webhooks. Tea Commerce will automatically create and register a webhook communication URL with Stripe for you when you save the provider settings with valid API keys.
NB You need to register webhooks for both the test and live modes. Depending on which mode you have configured in the payment provider settings will determine which type of webhook registration is generated.
TIP If you need to test your webhooks locally, we recommend you use a tool such as ngrok which can create a temporary public URL that safely proxies to your localhost server, allowing you to receive the Stripe webhook requests without the need to alter your firewall settings. When using such a tool, it may be necessary to alter the base URL of the communication URL generated by the provider. To do this, you can add a setting named test_base_url with the base URL you'd like to use instead and the communication URL will be generated based on this URL instead.
If you need to regenerate a webhook endpoint at any point, you should delete the existing webhook from within the Stripe dashboard and then re-save the payment provider to trigger the creation of a new one.
If webhook generation is successful, 2 new payment provider settings will be generated:
- test_webhook_id The ID of the generated webhook
- test_webhook_secret The signing secret for validating webhook communications
If you don't see these settings generated, then something will have gone wrong with the generation process. Please review the sites log files for details.
Radar
The Stripe payment provider is automatically configured to send through billing contact information, this is in order for you to be able to perform validation rules using Stripe Radar. It is optional, but strongly recommended that you configure Radar Rules to validate the submitted Credit Card against these billing details. See the Radar documentation for more details.
Configure Tea Commerce
For the most part, the Stripe Subscription provider settings are similar to the regular Stripe provider however there is one important feature worth highlighting.
With the Stripe Subscription provider it is possible to configure it such that it can either capture payments right now, in which case a credit card checkout form will be presented at the payment stage, or you can actually configure it to send out invoices instead. This could be an attractive option for B2B where invoicing is the norm.
To conifgure this feature, you can use the billing_mode setting as documented in the table below.
NB If you would like to offer both options, credit card / invoice, you would need to setup two instances of the Stripe Subscription provider configured accordingly and then allow them to choose the relevant option at checkout.
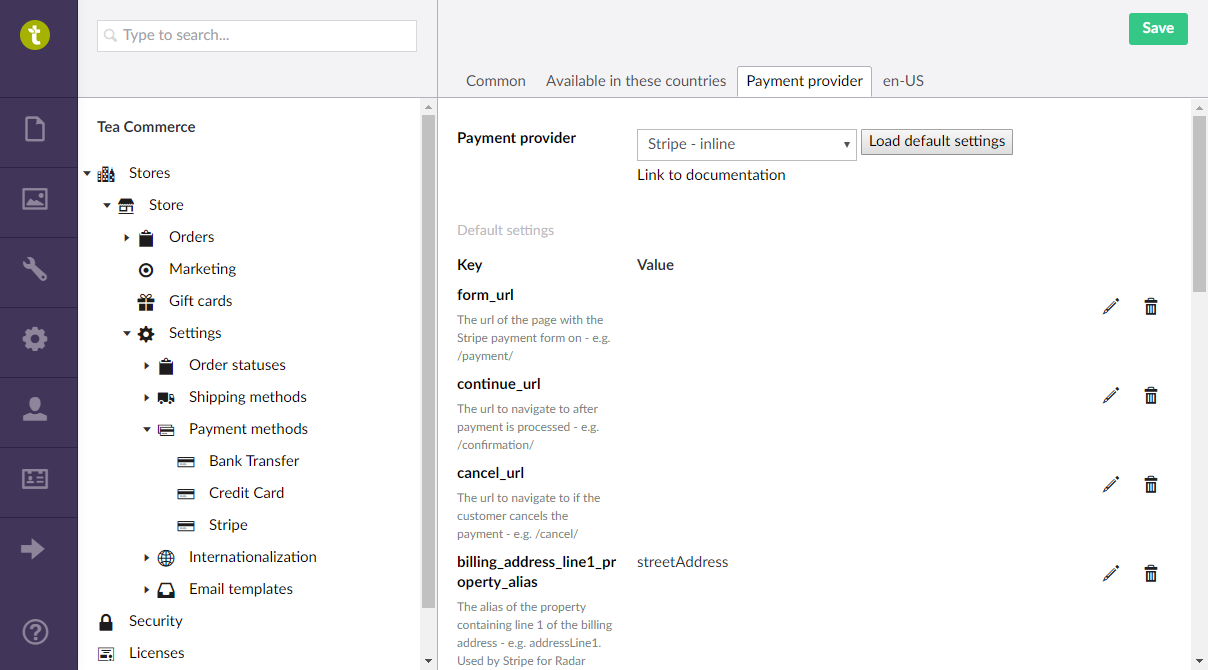
Provider Settings
Create a payment method and select StripeSubscription - inline as the payment provider. Now configure the settings as follows.
| Key | Description |
|---|---|
| form_url | The url of the page with the Stripe payment form on - e.g. /payment/ |
| continue_url | The url to navigate to after payment is processed - e.g. /confirmation/ |
| cancel_url | The url to navigate to if the customer cancels the payment - e.g. /cancel/ |
| billing_address_line1_property_alias | The alias of the property containing line 1 of the billing address - e.g. addressLine1. Used by Stripe for Radar verification. |
| billing_address_line2_property_alias | The alias of the property containing line 2 of the billing address - e.g. addressLine2. Used by Stripe for Radar verification. |
| billing_city_property_alias | The alias of the property containing the billing address city - e.g. city. Used by Stripe for Radar verification. |
| billing_state_property_alias | The alias of the property containing the billing address state - e.g. state. Used by Stripe for Radar verification. |
| billing_zip_code_property_alias | The alias of the property containing the billing address zip code - e.g. zipCode. Used by Stripe for Radar verification. |
| test_secret_key | Your test stripe secret key. |
| test_public_key | Your test stripe public key. |
| test_webhook_id | ID of the auto created test Stripe webhook. Automatically generated. |
| test_webhook_secret | Tive webhook signing secret for validating webhook requests. Automatically generated. |
| test_base_url | An explicit base URL to use when generating the live webhook notification URL. |
| live_secret_key | Your live stripe secret key. |
| live_public_key | Your live stripe public key. |
| live_webhook_id | ID of the auto created live Stripe webhook. Automatically generated. |
| live_webhook_secret | Live webhook signing secret for validating webhook requests. Automatically generated. |
| live_base_url | An explicit base URL to use when generating the live webhook notification URL. |
| mode | The mode of the provider - test/live. |
| billing_mode | Whether to charge payments instantly via credit card or to send out Stripe invoices - charge/invoice. |
| invoice_days_until_due | If billing mode is set to 'invoice', the number of days untill the invoice is due. |
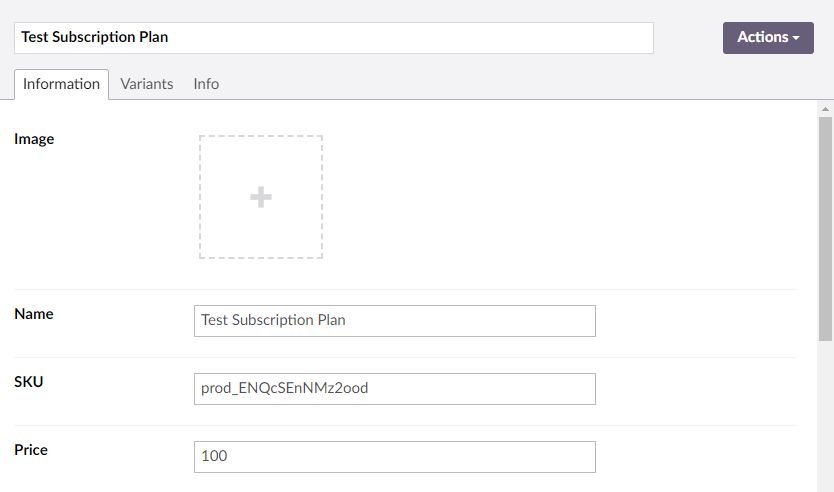
Configure Umbraco
As mentioned in the section intro, with the Stripe Subscription provider we have to setup products in a specific way. When configuring your product we need to store and pass through the Stripe Subscription Plan ID to the checkout process. The simplest way to do this is to set the products SKU to be the Plan ID.
If you need to set the SKU to something other than the Plan ID however, you can store the Plan ID in an alternative property and then pass this through on the OrderLine via property with the alias "planId".
The simplest way to do this would be to use an umbraco property with the alias "planId" and then configure OrderLine Automatic Properies to copy the "planId" field to the OrderLine properties collection.
Stripe Subscription Events
Working with subscriptions is somewhat different to working with standard products as the state of the subscription can change over time and so it is often desirable to know when these changes occur. To assist with this the Stripe Subscription payment provider will trigger events when certain state changes occur (so long as a valid Webhook has been configured).
To listen for events you should register an event handler like so:
public StripeSubscriptionEventHandler: ApplicationEventHandler
{
    protected override void ApplicationStarted(UmbracoApplicationBase umbracoApplication, ApplicationContext applicationContext)
    {
        StripeSubscription.StripeSubscriptionEvent += (sender, args) {
            // Handling logic goes here
        }
    }
}
The subscribed event handler will receive a sender argument, which is the instance of the StripeSubscription payment provider sending the event and an args argument which is an instance of the StripeSubscriptionEventArgs class.
The StripeSubscriptionEventArgs class contains the following properties:
| Name | Description |
|---|---|
| Order | A copy of the Tea Commerce order this event relates to. |
| Subscription | An instance of the Stripe subscription object this event relates to. |
| Invoice | An instance of the Stripe invoice object this event relates to. Not all events have an invoice instance. |
| Type | The type of event being fired. Can be one of SubscriptionCreated, SubscriptionStarted, SubscriptionRenewing, SubscriptionRenewed, SubscriptionPastDue, SubscriptionTrialEnding, SubscriptionUpdated or SubscriptionDeleted |